이번에 만들 프레그먼트는 저장한 일정들을 띄워주기위한 리사이클러 뷰 입니다. 리사이클러뷰는 ViewHolder패턴을 사용하여 View를 재사용한다는 차이점이 있습니다.
항목이 스크롤되어 화면에서 벗어나더라도 RecyclerView는 뷰를 제거하지 않습니다. 대신 RecyclerView는 화면에서 스크롤된 새 항목의 뷰를 재사용합니다. 이렇게 뷰를 재사용하면 앱의 응답성을 개선하고 전력 소모를 줄이기 때문에 성능이 개선됩니다.
RecyclerView로 동적 목록 만들기 | Android 개발자 | Android Developers
컬렉션을 사용해 정리하기 내 환경설정을 기준으로 콘텐츠를 저장하고 분류하세요. RecyclerView로 동적 목록 만들기 Android Jetpack의 구성요소 RecyclerView를 사용하면 대량의 데이터 세트를 효율적
developer.android.com
첫번째로 레이아웃부터 구성해주도록 하겠습니다.
<androidx.recyclerview.widget.RecyclerView
    android:id="@+id/schedule_view"
    android:layout_width="match_parent"
    android:layout_height="wrap_content"
    android:scrollbarSize="5dp"
    android:scrollbars="vertical"
    tools:listitem="@layout/schedule_item"
    />
레이아웃 안에서 <recy..까지만 쳐도 자동완성으로 나옵니다. 이후 위 코드와 같은 위젯을 선택해 준뒤 각종 속성들을 원하시는대로 설정해 주시면 됩니다.
다른 속성들도 중요하지만 "tools:listitem=" 이속성은 리사이클러뷰의 외관을 담당하는 속성으로 아주 중요하다고 개인적으로 생각합니다. ㅎ.ㅎ
표현될 아이템을 설정해 주지않는다면
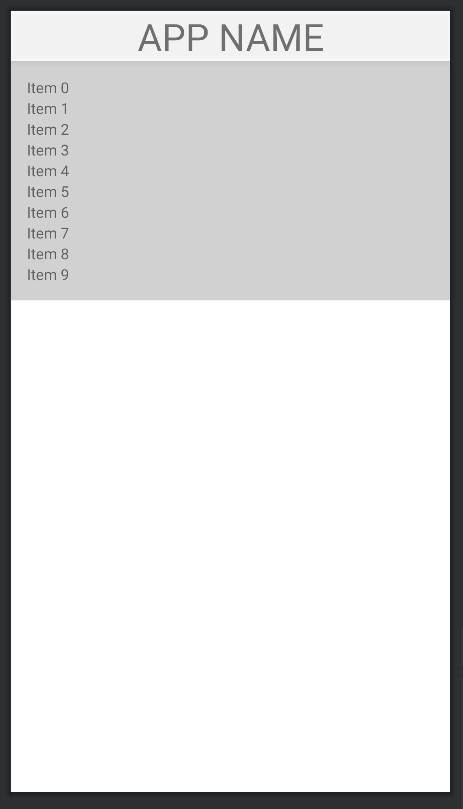
이런식으로 밋밋하게 텍스트만 설정됩니다.
하지만 "tools:listitem=" 속성을 설정해준다면

이런식으로 다양한 요소들을 집어 넣을 수 있습니다.
이런 아이템 파일들도 다른 레이아웃 파일들과 똑같이 [res]-[layout]폴더에 xml파일로 생성해 주면됩니다.
저는 보통 리사이클러 뷰 아이템을 만들때 CardView를 사용합니다! 필요에따라서 맞는걸 사용하시면 되겠습니다!
<?xml version="1.0" encoding="utf-8"?>
<androidx.cardview.widget.CardView xmlns:android="http://schemas.android.com/apk/res/android"
    android:layout_width="match_parent"
    android:layout_height="80dp"
    android:layout_margin="10dp"
    android:focusable="true"
    android:elevation="20dp"
    android:background="@drawable/round_rectangle"
    >

    <LinearLayout
        android:id="@+id/layout"
        android:layout_width="match_parent"
        android:layout_height="wrap_content"
        android:padding="5dp"
        android:orientation="horizontal"
        android:focusable="true"
        android:layout_gravity="center"
        android:focusableInTouchMode="true">

        <TextView
            android:id="@+id/D"
            android:layout_width="wrap_content"
            android:layout_height="wrap_content"
            android:text="D"
            android:textSize="40dp"
            android:textColor="@color/black"
            android:layout_marginLeft="10dp"
            />

        <TextView
            android:id="@+id/d_day_view"
            android:layout_width="wrap_content"
            android:layout_height="wrap_content"
            android:layout_marginLeft="5dp"
            android:hint="day"
            android:textColor="@color/black"
            android:textSize="40dp" />
        <LinearLayout
            android:layout_width="wrap_content"
            android:layout_height="wrap_content"
            android:orientation="vertical"
            android:layout_gravity="center"
            android:layout_marginLeft="10dp">
            <TextView
                android:id="@+id/schecule_name"
                android:layout_width="wrap_content"
                android:layout_height="wrap_content"
                android:layout_gravity="center"
                android:hint="일정 제목"
                android:textColor="@color/black"
                android:textSize="20dp"
                />
            <TextView
                android:id="@+id/schedule_place"
                android:layout_width="wrap_content"
                android:layout_height="wrap_content"
                android:hint = "약속 장소"
                android:layout_marginTop="5dp"
                />

        </LinearLayout>

        <TextView
            android:id="@+id/s_date"
            android:layout_width="wrap_content"
            android:layout_height="wrap_content"
            android:hint="시작일"
            android:layout_gravity="center"
            android:textSize="15dp"
            android:visibility="gone"
            android:layout_marginLeft="10dp"/>
        <TextView
            android:id="@+id/e_date"
            android:layout_width="wrap_content"
            android:layout_height="wrap_content"
            android:hint="종료일"
            android:visibility="gone"
            android:layout_gravity="center"
            android:layout_marginLeft="10dp"
            android:textSize="15dp"/>

    </LinearLayout>
</androidx.cardview.widget.CardView>
이제 레이아웃은 다 작성했으니 클래스파일로 넘어가보겠습니다
리사이클러뷰를 구현하려면 레이아웃에 연결하는 리사이클러뷰 클래스와 RecyclerView에 표시될 데이터와 RecyclerView에 표시될 뷰를 연결하는 어댑터 클래스의 두 가지 클래스를 만들어야 합니다.
우선 리사이클러 뷰 클래스 코드입니다
class RecycleView_Frag : Fragment() {

    private lateinit var binding: FragmentRecycleViewBinding
    private lateinit var db: AppDatabase

    private val scheduleList = ArrayList<User>()
    private lateinit var adapter: schedule_Adapter

    override fun onCreateView(inflater: LayoutInflater, container: ViewGroup?, savedInstanceState: Bundle?): View {
        binding = FragmentRecycleViewBinding.inflate(inflater, container, false)
        val rv = binding.scheduleView
        //리사이클러뷰에 레이아웃매니저 설정
        rv.layoutManager = LinearLayoutManager(requireContext())
        adapter = schedule_Adapter(scheduleList) //어댑터에 리스트 전달
        rv.adapter = adapter //어댑터 연결

        //db연결 코드 , 추후 DB파트 이후 추가
        return binding.root
    }
}
RecyclerView 클래스에서는 일반적으로 다음과 같은 내용을 작성합니다.
RecyclerView의 속성 설정
RecyclerView에 표시될 데이터 어댑터 연결
RecyclerView의 모양과 동작을 제어하는 코드
이후 어댑터 클래스 코드입니다.
class schedule_Adapter(val scheduleList: ArrayList<User>) : RecyclerView.Adapter<schedule_Adapter.ViewHolder>() {

    // 뷰홀더 클래스 구현
    class ViewHolder(itemView: View) : RecyclerView.ViewHolder(itemView) {
        // 아이템 뷰 내부의 뷰들을 가져오는 작업 등을 수행합니다.
        val s_title = itemView.findViewById<TextView>(R.id.schecule_name)
        //기타 다른 위젯들
    }

    // onCreateViewHolder() 메서드 구현
    override fun onCreateViewHolder(parent: ViewGroup, viewType: Int): ViewHolder {
        val view = LayoutInflater.from(parent.context).inflate(R.layout.schedule_item, parent, false)
        return ViewHolder(view)
    }

    // onBindViewHolder() 메서드 구현
    override fun onBindViewHolder(holder: ViewHolder, position: Int) {
        // 아이템 뷰 내부의 뷰들에 데이터를 설정하는 작업 등을 수행합니다.
        holder.s_title.text = scheduleList[position].schedule_name


        // D-Day를 구하고 TextView에 표시합니다.
        val dDay = getDDay(scheduleList[position].start_date)
        if(dDay == 0) holder.d_day.text = "DAY"
        else holder.d_day.text = dDay.toString()


        //길게 누를시 삭제
        holder.itemView.setOnLongClickListener {
            // 해당 아이템의 ID를 가져옵니다.
            val id = scheduleList[holder.adapterPosition]

            // 비동기적으로 데이터베이스에서 해당 아이템을 삭제합니다. 추후 추가 예정

                // ArrayList에서 해당 아이템을 삭제합니다.
                withContext(Dispatchers.Main) {
                    scheduleList.removeAt(holder.adapterPosition)

                    // RecyclerView에서 해당 아이템을 삭제합니다.
                    notifyItemRemoved(holder.adapterPosition)
                }
            }
            true
        }

        /*holder.itemView.setOnClickListener{
            Toast.makeText(this,"아직 레이아웃 설정안됨!",Toast.LENGTH_SHORT).show()
        }*/
    }


    private fun getDDay(endDate: Date): Int {
        // 오늘 날짜를 구합니다. localDate --> Date타입
        val today = LocalDate.now()
        Log.e("오늘 날짜" , today.toString())

        // 종료 날짜를 구합니다.
        val end2 = LocalDate.of(endDate.year, endDate.month + 1, endDate.date)
        val end = endDate.toInstant().atZone(ZoneId.systemDefault()).toLocalDate()
        Log.e("일정 시작 날짜",endDate.toString())

        // D-Day를 계산합니다.
        //val diff = end.timeInMillis - today.timeInMillis
        val diff = Period.between(today, end).days
        //val days = diff/(24*60*60*1000)
        return return if (diff == 0) 0 else diff
    }
    // getItemCount() 메서드 구현
    override fun getItemCount(): Int {
        Log.e("리스트 갯수",scheduleList.size.toString())
        return scheduleList.size //아이템 갯수 자동 카운트
    }
}
RecyclerView 어댑터 클래스에서는 일반적으로 다음과 같은 내용을 작성합니다.
- RecyclerView에 표시될 데이터 가져오기
- RecyclerView에 표시될 뷰에 데이터 바인딩
- RecyclerView에 표시될 뷰의 모양과 동작을 제어하는 코드
뷰홀더 클래스에 레이아웃에서 설정한 위젯들을 가져온뒤 onCreateViewHolder()를 통해서 RecyclerView에 표시될 새로운 뷰 홀더를 생성합니다.
이후 리사이클러 뷰에서 수행되는 동작은 거의 onBindViewHolder()에 작성해 주었습니다. onBindViewHolder는 RecyclerView에 표시될 각 항목에 대해 한 번씩 호출됩니다.
이렇게해서 리사이클러 뷰에대한 구현이 끝났습니다. 정말 기초적인 부분들만 사용하여 제작해보았으며 개인적으로 좋아하는 View중 하나입니다.
'Android > [Kotlin]' 카테고리의 다른 글
| [Android][Kotlin] Schedule App - Fragment(1) (2) | 2023.05.09 |
|---|---|
| [Android][Kotlin] Schedule app - 메인 액티비티(1) (0) | 2023.05.09 |
| [Android][Kotlin] Schedule app만들기-(0) (0) | 2023.05.08 |
| [Kotlin] 카메라 예제 (0) | 2023.04.01 |


